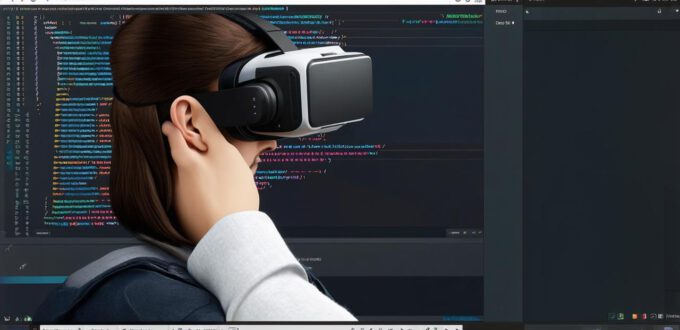
Are you ready to dive into the world of virtual reality (VR) development? Unity is one of the most popular game engines used for creating VR apps. In this tutorial, we’ll walk you through the process of building a simple VR app using Unity. We’ll cover everything from setting up your development environment to coding and testing your app.
Setting Up Your Development Environment
The first step to building a VR app is setting up your development environment. Here are the steps you need to follow:
- Download Unity Hub: Unity Hub is a desktop application that allows you to manage your Unity projects and install packages. You can download it from the official Unity website.
2. Install Unity: Once you’ve downloaded Unity Hub, open it up and click on “Install.” Follow the prompts to install Unity on your computer.
3. Create a new project: After installing Unity, open Unity Hub and click on “New Project.” Select “VR” as the template and give your project a name. Choose a location where you want to save your project.
4. Install necessary packages: To build a VR app, you’ll need to install some necessary packages. Open Unity and go to Assets > Packages Manager > Search Package Registry. Type “VR” in the search bar and install the following packages:
<strong>Vuforia</strong></li><strong>SteamVR_2.0</strong></li>
Coding Your VR App
Now that you have your development environment set up, it’s time to start coding. Here are the steps you need to follow:
- Create a scene: Open Unity and create a new scene by going to "GameObject" > "3D Object." Add a cube or any other 3D object to your scene. You can also add a camera by going to "GameObject" > "Camera."
2. Set up Vuforia: To set up Vuforia, go to “Window” > “VR Devices” and select “Vuforia Settings.” Follow the prompts to configure your device for Vufaria. You’ll need to create a new marker by going to “Assets” > “Create” > “Marker (VR)” and assign it to your 3D object.
3. Add code: To add code to your app, go to “Assets” > “C Script.” Create a new script and name it “MyVRApp.” In this script, you’ll need to write the following code:
javascript
<code><strong>using UnityEngine;</strong>;
<strong>using Vuforia;</strong>;
public class MyVRApp : MonoBehaviour
{
public VuforiaBehaviour marker;
void Start()
{<code><strong>marker.enabled true;</strong>;
}
}
</code></strong>
This code enables the Vuforia marker on your 3D object.
4. Build and test your app: Once you’ve written the code, it’s time to build and test your app. Go to “Build” > “Build Settings.” Select “Android” as the platform and choose a location where you want to save your APK file. Click on “Build” and wait for the build process to complete. Once it’s done, open the APK file on your Android device and test your app.
Congratulations! You’ve just built your first VR app using Unity.
Case Study: Building a Virtual Tour of a Museum Using Unity
Now let’s take a look at a real-life example of building a VR app using Unity. We’ll be building a virtual tour of a museum.
Step 1: Setting Up Your Development Environment
The first step is to set up your development environment. Here are the steps you need to follow:
- Download Unity Hub and install Unity on your computer.
2. Create a new project in Unity Hub and select “VR” as the template. Give your project a name and choose a location where you want to save it.
3. Install necessary packages by going to Assets > Packages Manager > Search Package Registry. Type “VR” in the search bar and install the following packages:
<strong>Vuforia</strong></li><strong>SteamVR_2.0</strong></li>
Step 2: Coding Your VR App
The next step is to start coding your app. Here are the steps you need to follow:
- Open Unity and create a new scene by going to "GameObject" > "3D Object." Add any objects you want to include in your virtual tour, such as paintings or exhibits. You can also add a camera by going to "GameObject" > "Camera."
2. Set up Vuforia by going to “Window” > “VR Devices” and selecting “Vuforia Settings.” Follow the prompts to configure your device for Vufaria. You’ll need to create markers by going to “Assets” > “Create” > “Marker (VR)” and assign them to each object in your scene.
3. Add code to your app by going to “Assets” > “C Script.” Create a new script and name it “MyVRApp.” In this script, you’ll need to write the following code:
javascript
<code><strong>using UnityEngine;</strong>;
<strong>using Vuforia;</strong>;
public class MyVRApp : MonoBehaviour
{
public VuforiaBehaviour marker;
void Start()
{<code><strong>marker.enabled true;</strong>;
}
}
</code></strong>
This code enables the Vuforia marker on each object in your scene.
4. Build and test your app by going to “Build” > “Build Settings.” Select “Android” as the platform and choose a location where you want to save your APK file. Click on “Build” and wait for the build process to complete. Once it’s done, open the APK file on your Android device and test your app.
Congratulations! You’ve just built a virtual tour of a museum using Unity.
Comparing Unity VR App Development with Other Tools
Now that you know how to build a VR app using Unity, let’s compare it with other tools used for VR app development.
- A-Frame: A-Frame is an open-source web framework for building VR experiences using HTML and JavaScript. It’s easy to learn and use, but it lacks some of the advanced features of Unity.
- Unreal Engine: Unreal Engine is another popular game engine used for VR app development. It has more advanced features than Unity, but it can be more difficult to learn and use.
- Build and test your app by going to "Build" > "Build Settings." Select "Android" as the platform and choose a location where you want to save your APK file. Click on "Build" and wait for
